
Laser Treatment Before and After: 6 Real Results
You're flipping through a clinic's gallery when you notice something confusing: one person's skin looks almost hair-free, while another still has visible regrowth after a treatment series. Is the difference the laser, the body area, or when someone took the photograph? Without that context, an impressive image can tell you surprisingly little.
Laser treatment before and after photos should show a treatment journey, not promise an identical outcome. Hair growth cycles, skin tone, hair thickness, session spacing, and technology all affect what you see. Even the smoothest photograph can't tell you whether someone shaved immediately beforehand or needed maintenance afterward.
When you're comparing laser treatments for unwanted hair, look for reduced density and slower regrowth rather than flawless skin alone. The examples below describe realistic treatment scenarios, not documented individual patient outcomes. Use their preparation, scheduling, and photography tactics to make your own progress easier to judge.
1. Underarm Laser Hair Removal Before and After Progression
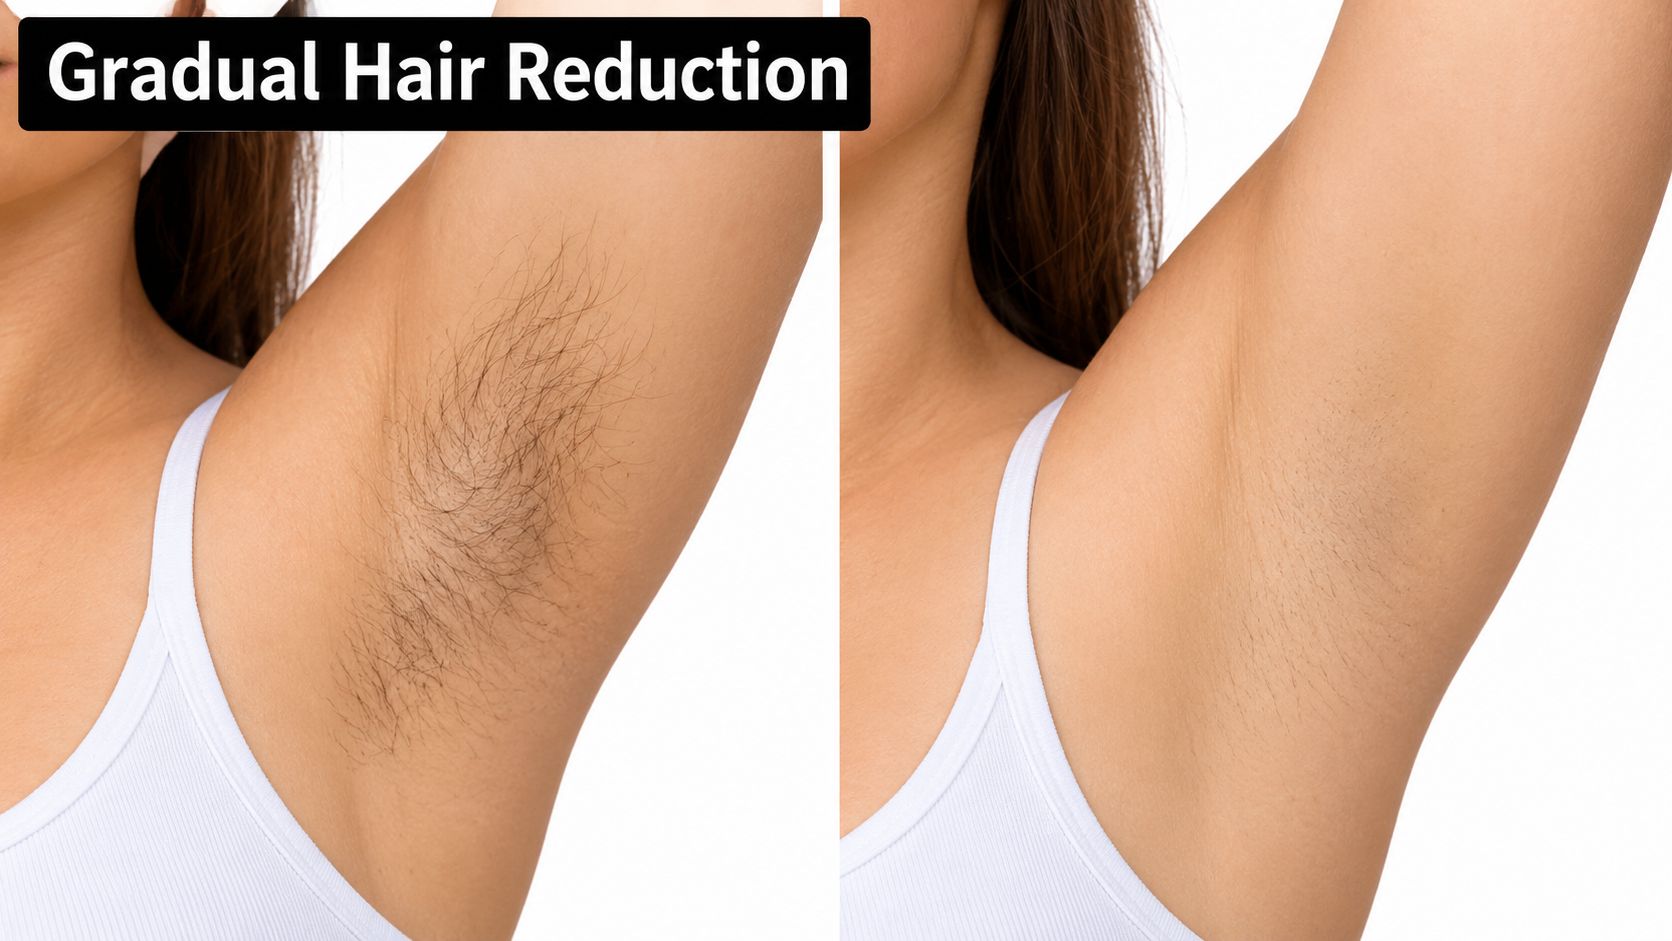
Underarm progress is often easiest to understand by watching the gaps between hairs. Say you're shaving frequently and want less visible stubble. A useful result isn't necessarily an entirely bare underarm, it's less dense regrowth and less effort maintaining it.
Laser targets pigment in the hair, but not every hair is equally responsive at the same appointment. A systematic evidence review in the Journal of the European Academy of Dermatology and Venereology found that repeated treatments improve efficacy and documented partial short-term hair reduction lasting up to six months after treatment. That supports judging a series rather than treating the first appointment as a final test.
This comparison illustrates the kind of density change to examine, rather than a guaranteed result.
Build a Comparable Underarm Record
Preparation starts with preserving the follicle target. Our instructions require avoiding waxing, plucking, threading, and electrolysis for 4–6 weeks before treatment, then shaving the area to skin level. Arrive with clean skin and no product residue.
Session cadence: Follow the individualized schedule rather than booking whenever stubble becomes inconvenient. Our underarm session guide explains how to approach the series.
Results timeline: Watch for shedding followed by less crowded regrowth. Don't interpret every returning hair as treatment failure.
Photo tactic: Raise your arm to the same position, use the same lighting, and record how long it's been since shaving.
Practical rule: A freshly shaved after photo isn't proof of reduced hair growth. Compare equivalent grooming stages.
2. Bikini and Brazilian Laser Hair Removal Before and After Results
For bikini treatment, defining the border matters as much as choosing the laser. Someone who wants fewer hairs outside a swimsuit has a different treatment goal from someone seeking broader Brazilian reduction. Agree on that boundary before treatment, and keep it consistent throughout the series.
Consider a client whose main frustration is repeated shaving along the bikini edge. Their most useful comparison would track regrowth within that agreed strip, not compare differently groomed intimate areas. A smaller, clearly defined goal can be easier to evaluate accurately.
A clinical review in Lasers in Medical Science reports mean hair removal of 74% after an average of 5.6 treatment sessions across different body areas. That isn't a bikini-specific promise, but it illustrates why a dramatic final photograph needs a session history alongside it.
Plan Around Comfort and Regrowth
Shave to skin level before the appointment, and don't wax or pluck between sessions. Tell the technician about irritation, broken skin, or products you've used in the area. Discuss comfort before treatment begins rather than waiting until you're struggling through it.
Keep the cadence individualized. The bikini laser session guide can help you understand planning, but a package size isn't a guarantee of completion. Regrowth and skin response should guide reassessment.
Afterward, minimize friction and avoid heat or strenuous activity while the skin feels irritated. A cool compress can be more comfortable than rubbing or applying heavily fragranced products.
For photographs, use a tightly cropped, private image with the same garment edge or anatomical boundary visible. Record the treatment date and shaving interval. Judge the later result by density, distribution, and maintenance effort, not immediate post-treatment smoothness.
3. Full Leg Laser Hair Removal Before and After Transformation
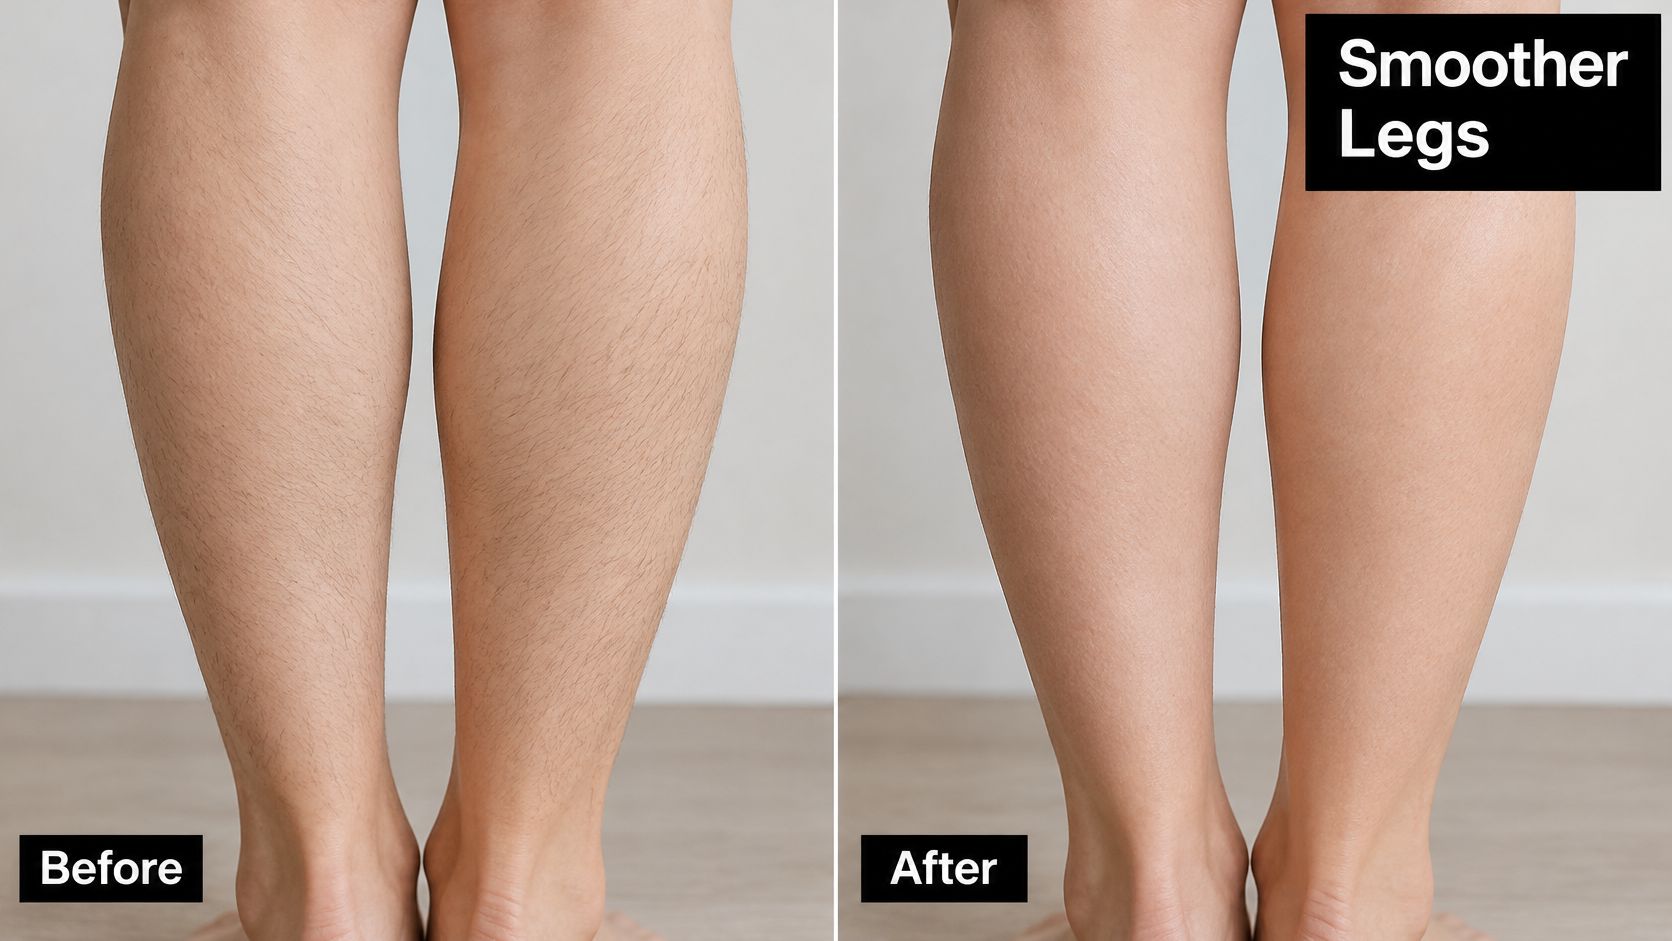
Full-leg photographs can look especially dramatic because they cover so much skin. They can also hide uneven progress: a smooth shin doesn't tell you what happened behind the knee or across the thigh. Treat the leg as a collection of zones when documenting change.
For someone tired of shaving before every beach outing, the practical aim might be less frequent grooming and fewer conspicuous patches. That's a more useful benchmark than expecting every part of the leg to respond identically.
This image offers a broad visual comparison, but close-up records are needed to assess individual areas.
Track Coverage, Not Just Smoothness
A peer-reviewed clinical review available through PubMed Central describes reported clearance ranging from 20% to 75% depending on follow-up, emphasizing that early measurements can look stronger than longer-term results. Those varied outcomes aren't a forecast for your legs. They're a reason to ask when the after photograph was taken.
Prep: Shave carefully, including around knees and ankles. Our preparation policy requires avoiding sun exposure for two weeks before treatment, so plan around tanning and outdoor activities.
Cadence: Use your agreed schedule, with reassessment as regrowth changes. The leg treatment session guide provides additional planning context.
Timeline: Evaluate regrowth after the initial smooth period, not just the appearance immediately after shedding.
Photography: Take matching front, side, and back views, plus close-ups of areas that remain dense.
Moisturize gently after treatment and protect exposed skin from the sun. Cooler-season scheduling may make sun avoidance easier, but the calendar doesn't replace preparation.
4. Back and Chest Laser Hair Removal for Men Before and After Results
A back you can't comfortably shave yourself presents a different problem from a chest you'd like to thin. Before starting, decide whether you want substantial reduction or a less dense appearance that still looks natural. The treatment boundary should match that goal, especially where the chest meets the abdomen or shoulders.
Say your goal is to stop relying on someone else to groom your back. Document the whole back, including the edges, rather than photographing only the clearest central patch. For chest treatment, include the transition into surrounding hair so you can assess whether the result looks balanced.
Less hair can be a successful outcome even when the area isn't completely bare. Define success before the first session.
Keep the Large-Area Plan Consistent
Prep: Don't assume thick body hair should be left long. Our treatment instructions require hair shaved to skin level, although a day's growth may help identify the area. Arrange help reaching the back if necessary, and arrive with the skin fully washed.
Cadence: Keep a written record of appointments, treated boundaries, and regrowth. A large area shouldn't be treated more aggressively just to chase a faster photograph. Wear loose clothing afterward to reduce rubbing against sensitive skin.
Results timeline: A clinical study published in 2025 followed 60 patients receiving a rotational laser protocol and reported mean hair reduction of 75.07% across body areas six months after the final treatment. This was a specific protocol, not a back-or-chest guarantee or an outcome to assign to another device.
For your own photographs, keep your shoulders relaxed and camera distance unchanged. Assess reduced coverage after regrowth, not just the freshly groomed appearance.
5. Facial Laser Hair Removal Upper Lip and Chin Before and After Results
Coarse chin hairs and fine facial fuzz shouldn't automatically receive the same treatment plan. A clearly visible dark hair may offer a useful laser target, while fine or lightly pigmented hair may respond poorly. Expanding treatment across the whole face for convenience can create an unnecessary trade-off.
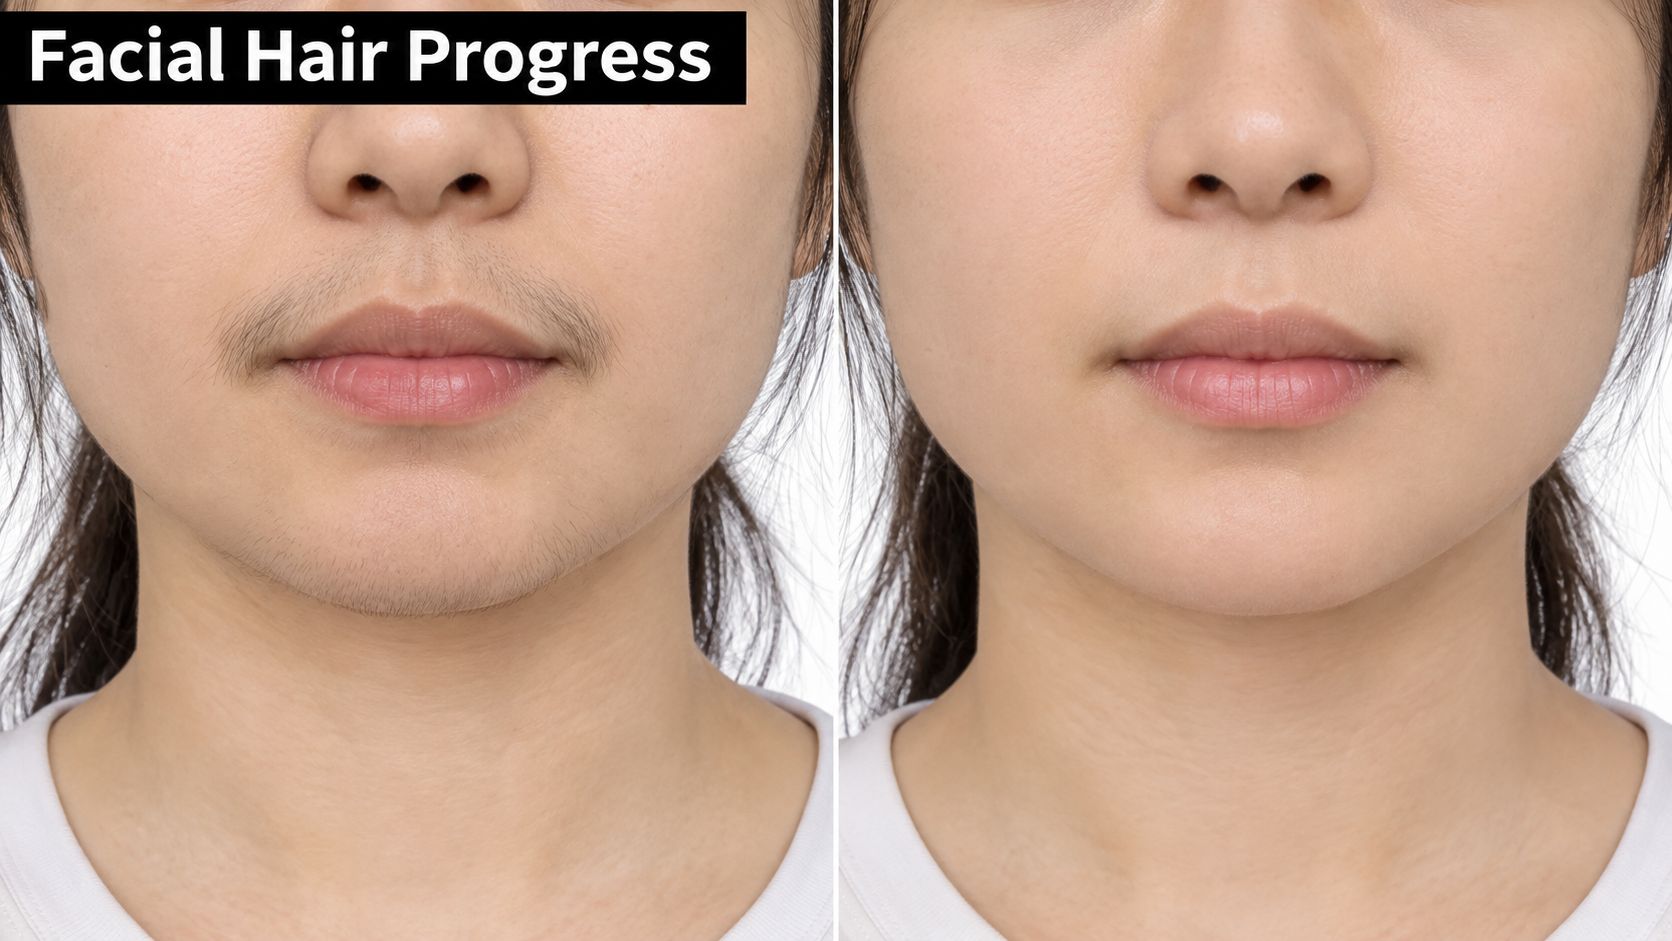
For example, someone managing scattered coarse chin hairs may benefit from carefully defining those targets rather than including nearby fine cheek hair. Facial regrowth can also have hormonal influences, so new or rapidly changing growth deserves medical assessment rather than repeated cosmetic treatment alone.
Look at this type of comparison for changes in visible hair, not changes in makeup, exposure, or skin tone.
Separate Shedding From Lasting Improvement
The American Academy of Dermatology's preparation guidance explains why consultation, medication disclosure, and avoiding hair-removal methods that disturb the follicle matter. Shaving preserves the target; waxing, plucking, and threading don't.
Prep: Arrive without makeup or topical medication on the treatment area. Tell us about prescriptions and skincare products before changing them, and don't stop prescribed medication without your prescriber's advice.
Cadence: Keep the agreed schedule, but reassess if the pattern changes or progress stalls. More appointments aren't automatically the answer.
Timeline: Track the interval between shaves and where coarse hairs return. Maintenance may remain part of the plan.
Photo tactic: Use close-ups with identical lighting, facial position, and time since shaving. Avoid concealer and smoothing filters.
Rarely, unwanted hair growth can occur after treatment, sometimes called paradoxical hypertrichosis. If hair appears denser or spreads beyond the original target, pause and arrange assessment rather than assuming it needs stronger treatment.
6. Laser Hair Removal Across Diverse Skin Tones Before and After Considerations
Darker skin doesn't automatically rule out laser hair removal. It does make skin assessment, wavelength selection, and conservative treatment planning especially important. A photograph of someone with a similar complexion is useful context, but it can't establish that the same settings suit you.
A consultation image is a reminder that treatment planning belongs in the before-and-after story too.

The American Academy of Dermatology's guidance on laser-treated skin conditions notes that darker skin requires particular care because burns and post-treatment dark marks are concerns. For a Long Island client with dark coarse hair and a history of pigmentation after irritation, the first priority is a plan that protects skin, not the fastest possible clearance.
Document Skin Response Alongside Hair Reduction
Prep includes disclosing recent tanning, self-tanner, medication use, and previous pigment changes. We assess skin type and hair color during consultation to personalize the plan. Discuss whether a test patch is appropriate before proceeding across a larger area.
Cadence and timeline should reflect skin recovery as well as regrowth. Don't push through persistent irritation to maintain a calendar. Temporary redness or swelling can occur, but blistering, worsening pain, or new pigment changes warrant prompt contact and assessment.
The accompanying video provides additional visual context for the treatment discussion.
Photo documentation should preserve skin color accurately. Keep exposure and white balance consistent, and photograph any reaction as well as later recovery.
A safe-looking final image doesn't reveal what happened between appointments. Include skin recovery in the record.
Before and After Results at a Glance
Find your treatment area in the left column, then read across for the session count and the timeline to expect.
Treatment Area | Zone Size | Typical Sessions | Results Timeline | Best For |
|---|---|---|---|---|
Underarms | Medium | 6 or more | Gradual thinning over several sessions, with visible reduction in the months after the series | First-time clients starting a lower-cost multi-session series |
Bikini and Brazilian | Medium to Large, depending on style | 6 or more | Reduced regrowth and finer hair after a full series | Clients who want long-term smoothness and fewer waxing appointments |
Full legs | Extra Large | 6 or more | Significant reduction and smoother skin after a complete series | Clients treating a large area for long-term reduction |
Back and chest | Large to Extra Large | 6 to 8 or more | Substantial reduction in coverage and density over a longer series | Men treating large areas such as the back and chest |
Upper lip and chin | Small | 6 or more; hormonal growth may need extra sessions | Gradual reduction, with timing that can vary with hormonal growth | Clients reducing facial hair on the upper lip and chin |
Full face | Large | 6 or more | Steady reduction across facial zones; lower-energy settings for darker skin may extend the timeline | Clients treating the whole face, including darker skin tones that call for customized settings |
Pricing follows the zone rather than the body part: single sessions are $25.00 for small areas, $39.99 for medium, $65.00 for large, and $99.99 for extra large. Every row assumes the same prep: the area shaved to skin level (a day of growth helps mark the zone) and fully washed, free of makeup and medication.
Reading Before-and-After Photos Like a Specialist
A clear before-and-after comparison uses consistent lighting, distance, and camera angle. It also records the treatment area, session timing, and how long hair was allowed to grow after shaving. Look for reduced density and slower regrowth across multiple photos, rather than judging progress by one smooth-looking image.
A photo shows only part of the story. Keep appointment dates and brief notes on shaving, visible patches, and skin response alongside each image. That record helps you compare changes over time and distinguish lasting reduction from a temporarily smooth surface.
Make Your Own Comparison Honest
Take photos under similar conditions each time, and leave them unretouched. Resources discussing safe settings for body editing belong in a creative-editing context, not clinical documentation. Changes to smoothing or exposure can hide the hair and pigment differences you want to track.
At NYC Laser Hair Removal in Westbury, specialist Tamar has over 17 years of laser hair removal experience. The center uses Splendor X, and its team assesses skin type and hair color during the initial consultation to shape a personalized treatment plan. Results depend on individual suitability and response, so another person's gallery is a reference, not a promise.
For residents of Westbury and the wider Long Island area, start with a specific goal, such as less shaving, reduced density, or easier maintenance in a defined area. Bring your medication list and relevant skin history to the consultation. Clear records and consistent photos make it easier to discuss progress and adjust expectations over a treatment series.
NYC Laser Hair Removal offers personalized Splendor X treatments for long-lasting hair reduction. Visit NYC Laser Hair Removal to book online, or call 516-321-4959 to arrange a consultation in Westbury.
Comments